Demo 1- Sectioning & Measuring
Click here to initiate the session in a new window.

Getting Started:
Note: The toolbar in the upper left controls sectioning and measuring. The left column is for measuring and the right column for sectioning.
-
Select the first snapshot
-
Select one of the pistons in the 3D pane
-
Part is highlighted in the 3D pane
-
Part is displayed in the cross-sectioning/measuring pane (upper right)
-
-
To measure the diameter of a cylinder, select the diameter tool
- Select the edge of the cylinder (not the face)
- A dimension will appear, drag this dimension to the desired location for readability
-
To cross-section, select the top button in the right column
- Select the type of cross-section you would like to perform
Demo 2 - Linked Parts List
Click here to initiate the session in a new window.

Getting Started:
- Sort the parts list, by clicking the arrow next to Name
- Select “Rear_SUS” (the rear sub-assembly)
- Notice the sub-assembly is now displayed in the isolation window
- Select “Display Child Parts” to see all of the parts in the sub-assembly
- Click parts on the model, the part will be highlighted in the parts list and shown in the parts window
- Click parts on the model, the part will be highlighted in the parts list and shown in the parts window
- Explore the any part of the demo you would like. If you get lost, just click the Home button to get back to the start.
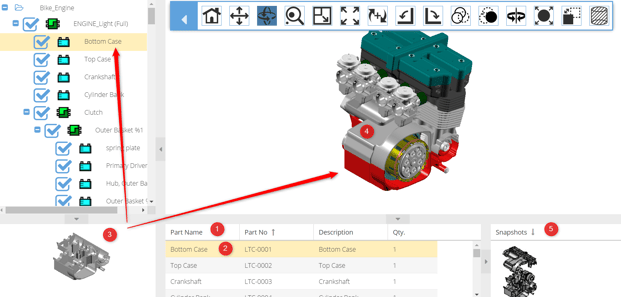
Demo 3 - Structured BOM & 3D Snapshots
Click here to initiate the session in a new window.
Getting Started:
- Sort by part number (ascending)
- Select the Bottom Case (LTC-001)
- Part is:
- Displayed in part browser panel
- Highlighted on 3D model
- Highlighted in the structured BOM
- In the 3D window, select the top case and notice the same
- Snapshot are preconfigured to show users specific views, select the second snapshot (Clutch)
- Parts in the subassembly
- Parts in the BOM
- 3D the window
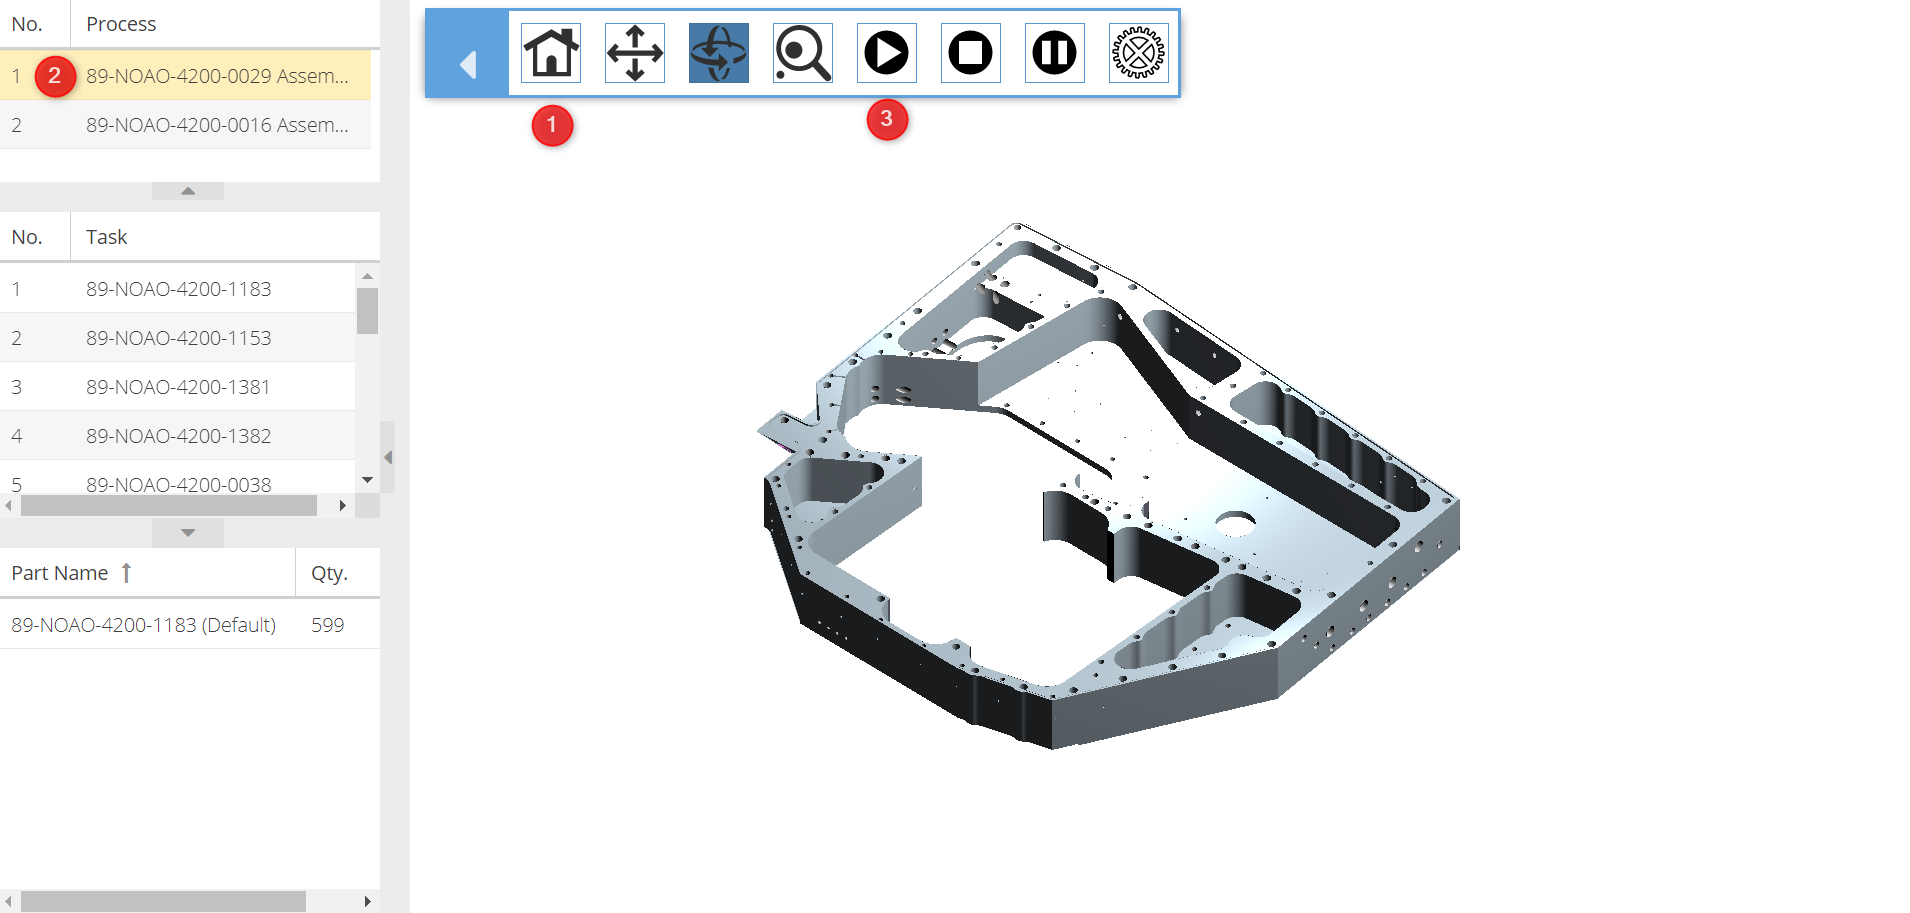
Demo 4 - Animation with Tasks
Click here to initiate the session in a new window.
Getting Started:
- Click the Home button, and use this same button to return to the start after exploring
- Select Process #1
- Select Play to see the animation
Want to Learn More About XVL?